Using a faucet and transferring tokens
On this page, you’ll learn how to seed a new account with a faucet and how to transfer tokens both to and from a given account using the UI.
On this page, you’ll learn:
-
How to create a faucet.
-
How to create a token transfer feature in the UI.
| The relevant files discussed in this guide are the faucet.js and the transfer.js. |
1. Creating a faucet
The aim of a faucet is to allow an account holder to seed their account with 10 tokens via a dedicated faucet account.
Firstly, define the necessary variables and the handleChange event.
// [...]
// UI libraries import
import React, { useState, useEffect } from "react";
// Lisk libraries import
import { cryptography, transactions } from '@liskhq/lisk-client/browser';
import * as api from '../api';
import { Buffer } from 'buffer';

function Faucet() {

    const [state, updateState] = useState({
        address: '',
        privateKey: '',
        error: '',
        transaction: {},
        response: {}
    });

    const handleChange = (event) => {
        const { name, value } = event.target;
        updateState({
            ...state,
            [name]: value,
        });
    };
    // [...]
}
export default Faucet;
We want an action to be taken when a user enters an address into the input and clicks on the Submit button.
This will be handled by the handleSubmit function, where we first create a token transfer transaction, and then post it to the node.
// [...]

function Faucet() {
    // [...]
    const handleSubmit = async (event) => {
        event.preventDefault();

        // 1. Get apiClient via api.js.
        const client = await api.getClient();

        // 2. Replace this with the passphrase in `passphrase.json`, if you initialized the application yourself.
        const passphrase = "mention adjust identify fatal execute road hurt seminar artist happy agree village whale govern monkey yard fluid amount sure enlist cabbage fold genius example";

        // 3. A private key will be used to sign a transaction. The private key is generated using the keyDerivationPath and the passphrase.
        const privateKey = await cryptography.ed.getPrivateKeyFromPhraseAndPath(passphrase, "m/44'/134'/0'");
        let responseError = '';

        // 4. Here we are creating a transaction by passing the module name, command, fee, and all the other required params.
        const signedTx = await client.transaction.create({
            module: 'token',
            command: 'transfer',
            fee: BigInt(transactions.convertLSKToBeddows('0.1')),
            params: {
                tokenID: Buffer.from('0000000100000000', 'hex'),
                amount: BigInt(transactions.convertLSKToBeddows('10')),
                recipientAddress: state.address,
                data: 'Please accept this grant from Lisk faucet.'
            }
        }, privateKey).catch(err => {
            responseError = err.message;
        });
        let txResponse = '';

        // 5. Once a transaction is created, it will be sent to the node and after block execution, the account's balance will increment with 10 tokens.
        if (typeof signedTx !== "undefined") {
            txResponse = await client.transaction.send(signedTx).catch(result => {
                console.log(result)
                responseError = result.message;
            });
        }

        // 6. Based on the response, the 'state' object will be updated.
        updateState({
            transaction: signedTx,
            response: txResponse,
            error: responseError,
            address: '',
            amount: '',
            fee: '',
            passphrase: '',
        });
    };
    // [...]
}
The code for creating and sending a transaction is now complete, let’s add the logic to display the response received from the node.
// [...]
function Faucet() {
    // [...]
    const displayData = () => {
        // If an error occurs, display the appropriate error.
        if (state.error !== '') {
            return (
                <>
                    <div className="ui red segment" style={{ overflow: 'auto' }}>
                        <h3>Something went wrong! :(</h3>
                        <pre><strong>Error:</strong> {JSON.stringify(state.error, null, 2)}</pre>
                    </div>
                </>
            )
        }
        // Check the values of the response received and display data accordingly.
        else if (typeof state.transaction !== 'undefined' && state.transaction.fee > 0) {
            return (
                <>
                    <h3>Your transaction's details are:</h3>
                    <div className="ui green segment" style={{ overflow: 'auto' }}>
                        <pre>Transaction: {JSON.stringify(state.transaction, null, 2)}</pre>
                        <pre>Response: {
                            JSON.stringify(state.response, null, 2)}</pre>
                    </div>
                </>
            )
        }
        else {
            return (<p></p>)
        }
    }
    // [...]
}
// [...]
Finally, the return function needs an update, to ensure that the form submission, listing of data, and the on-change event is functional.
// [...]
function Faucet() {
// [...]
return (
<>
<FixedMenuLayout />
<Container>
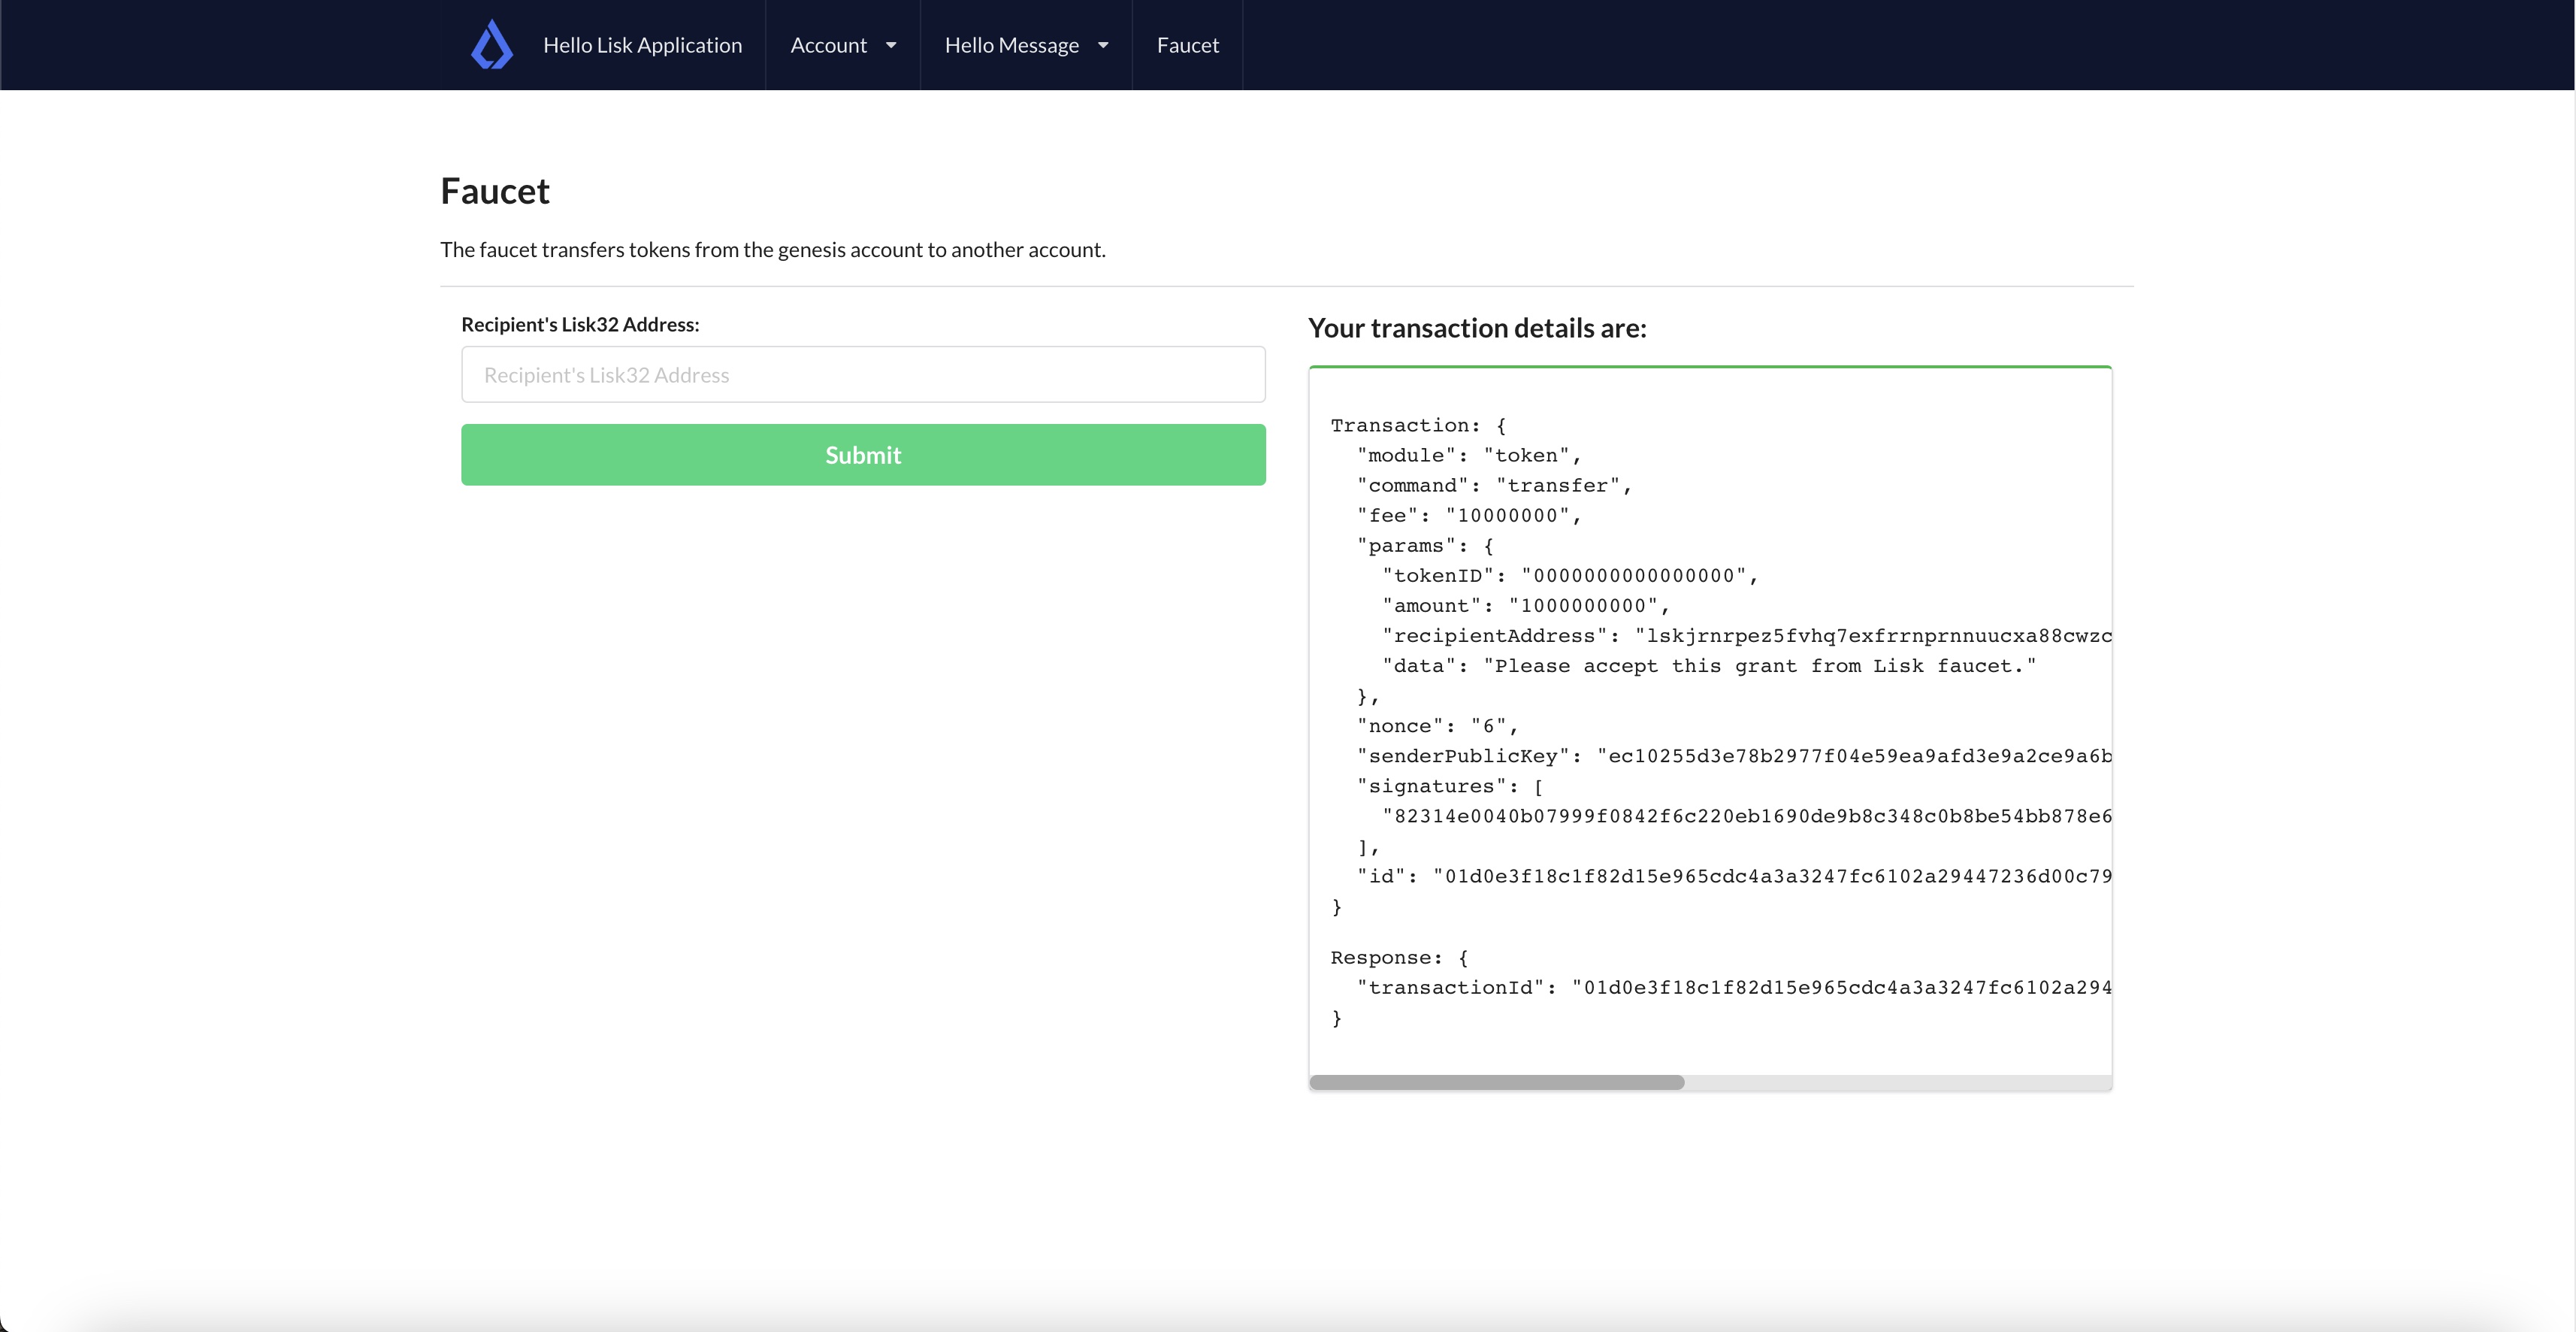
<h2>Faucet</h2>
<p>The faucet transfers tokens from the genesis account to another.</p>
<Divider></Divider>
<div>
<div className="ui two column doubling stackable grid container">
<div className="column">
<Form onSubmit={handleSubmit}>
<Form.Field>
<label>Recipient's Lisk32 Address:</label>
<input placeholder="Recipient's Lisk32 Address" id="address" name="address" onChange={handleChange} value={state.address} />
</Form.Field>
<Button type='submit' fluid size='large' style={{ backgroundColor: '#2BD67B', color: 'white' }}>Submit</Button>
</Form>
</div>
<div className='column'>
<>
{displayData()}
</>
</div>
</div>
</div>
</Container>
</>
);
// [...]
}
// [...]The faucet page is now ready, open the Faucet page and enter an account address.
Click on the Submit button, if the address is correct and the faucet account has an adequate balance, your transaction will be successful and an appropriate response will be displayed on the screen.
To check if the account balance has increased, use the account details page to fetch the account balance.
2. Transfer tokens
The Transfer tokens page shall provide an interface for users to transfer tokens to other accounts.
To perform a token transfer, a user needs to enter the recipient address, the amount of tokens they want to send, and the transaction fee they want to pay.
They also need to provide their passphrase to sign the transaction.
Once a user clicks the Submit button, the provided information is used to create the transaction, and then send it to the Hello blockchain node.
Similar to the faucet, we will start by importing the necessary libraries, defining the state variables, and the handleChange event.
// [...]
// UI libraries import
import React, { useState } from "react";
// Import Lisk packages, api, and buffer.
import { cryptography, transactions } from '@liskhq/lisk-client/browser';
import * as api from '../api';
import { Buffer } from 'buffer';

function Transfer() {
    const [state, updateState] = useState({
        address: '',
        amount: '',
        fee: '',
        passphrase: '',
        keyPath: '0',
        error: '',
        transaction: {},
        response: {}
    });

    const handleChange = (event) => {
        const { name, value } = event.target;
        updateState({
            ...state,
            [name]: value,
        });
    };
    // [...]
}
export default Transfer;
Next, create the handleSubmit function, which will take all the inputs entered by the user, and based on that will create a token transfer transaction.
function Transfer() {
    // [...]
    const handleSubmit = async (event) => {
        event.preventDefault();
        // 1. Get apiClient via api.js.
        const client = await api.getClient();

        // 2. This is the passphrase of the sender's account.
        const passphrase = state.passphrase;

        // 3. A private key will be used to sign a transaction. The private key is generated using the keyDerivationPath and the passphrase.
        const privateKey = await cryptography.ed.getPrivateKeyFromPhraseAndPath(passphrase, "m/44'/134'/" + state.keyPath + "'");
        let responseError = '';

        // 4. Here we are creating a transaction by passing the module name, command, fee, and all the other required params.
        const signedTx = await client.transaction.create({
            module: 'token',
            command: 'transfer',
            fee: BigInt(transactions.convertLSKToBeddows(state.fee)),
            params: {
                tokenID: Buffer.from('0000000100000000', 'hex'),
                amount: BigInt(transactions.convertLSKToBeddows(state.amount)),
                recipientAddress: state.address,
                data: 'Hey! I am sending you tokens. Enjoy!'
            }
        }, privateKey).catch(err => {
            responseError = err.message;
        });

        // 5. Once a transaction is created, it will be sent to the node and after block execution, the account's balance will increment with the amount of tokens sent to the account.
        let txResponse = '';
        if (typeof signedTx !== "undefined") {
            txResponse = await client.transaction.send(signedTx).catch(result => {
                console.log(result)
                responseError = result.message;
            });
        }

        // 6. Based on the response, the 'state' object will be updated.
        updateState({
            transaction: signedTx,
            response: txResponse,
            error: responseError,
            address: '',
            amount: '',
            fee: '',
            passphrase: '',
            keyPath: '',
        });
    };
    // [...]
}
// [...]
The code for creating and sending a transaction is now complete, let’s add the logic to display the response received from the node.
// [...]
function Transfer() {
    // [...]
    const displayData = () => {
        // If an error occurs, display the appropriate error.
        if (state.error !== '') {
            return (
                <>
                    <div class="ui red segment" style={{ overflow: 'auto' }}>
                        <h3>Something went wrong! :(</h3>
                        <pre><strong>Error:</strong> {JSON.stringify(state.error, null, 2)}</pre>
                    </div>
                </>
            )
        }
        // Check the values of the response received and display data accordingly.
        else if (typeof state.transaction !== 'undefined' && state.transaction.fee > 0) {
            return (
                <>
                    <h3>Your transaction's details are:</h3>
                    <div class="ui green segment" style={{ overflow: 'auto' }}>
                        <pre>Transaction: {JSON.stringify(state.transaction, null, 2)}</pre>
                        <pre>Response: {
                            JSON.stringify(state.response, null, 2)}</pre>
                    </div>
                </>
            )
        }
        else {
            return (<p></p>)
        }
    }
    // [...]
}
// [...]
Finally, the return function needs an update, so that the form submission, listing of data, and the on-change event can be functional.
// [...]
function Transfer() {
// [...]
return (
<>
<div>
<FixedMenuLayout />
<Container>
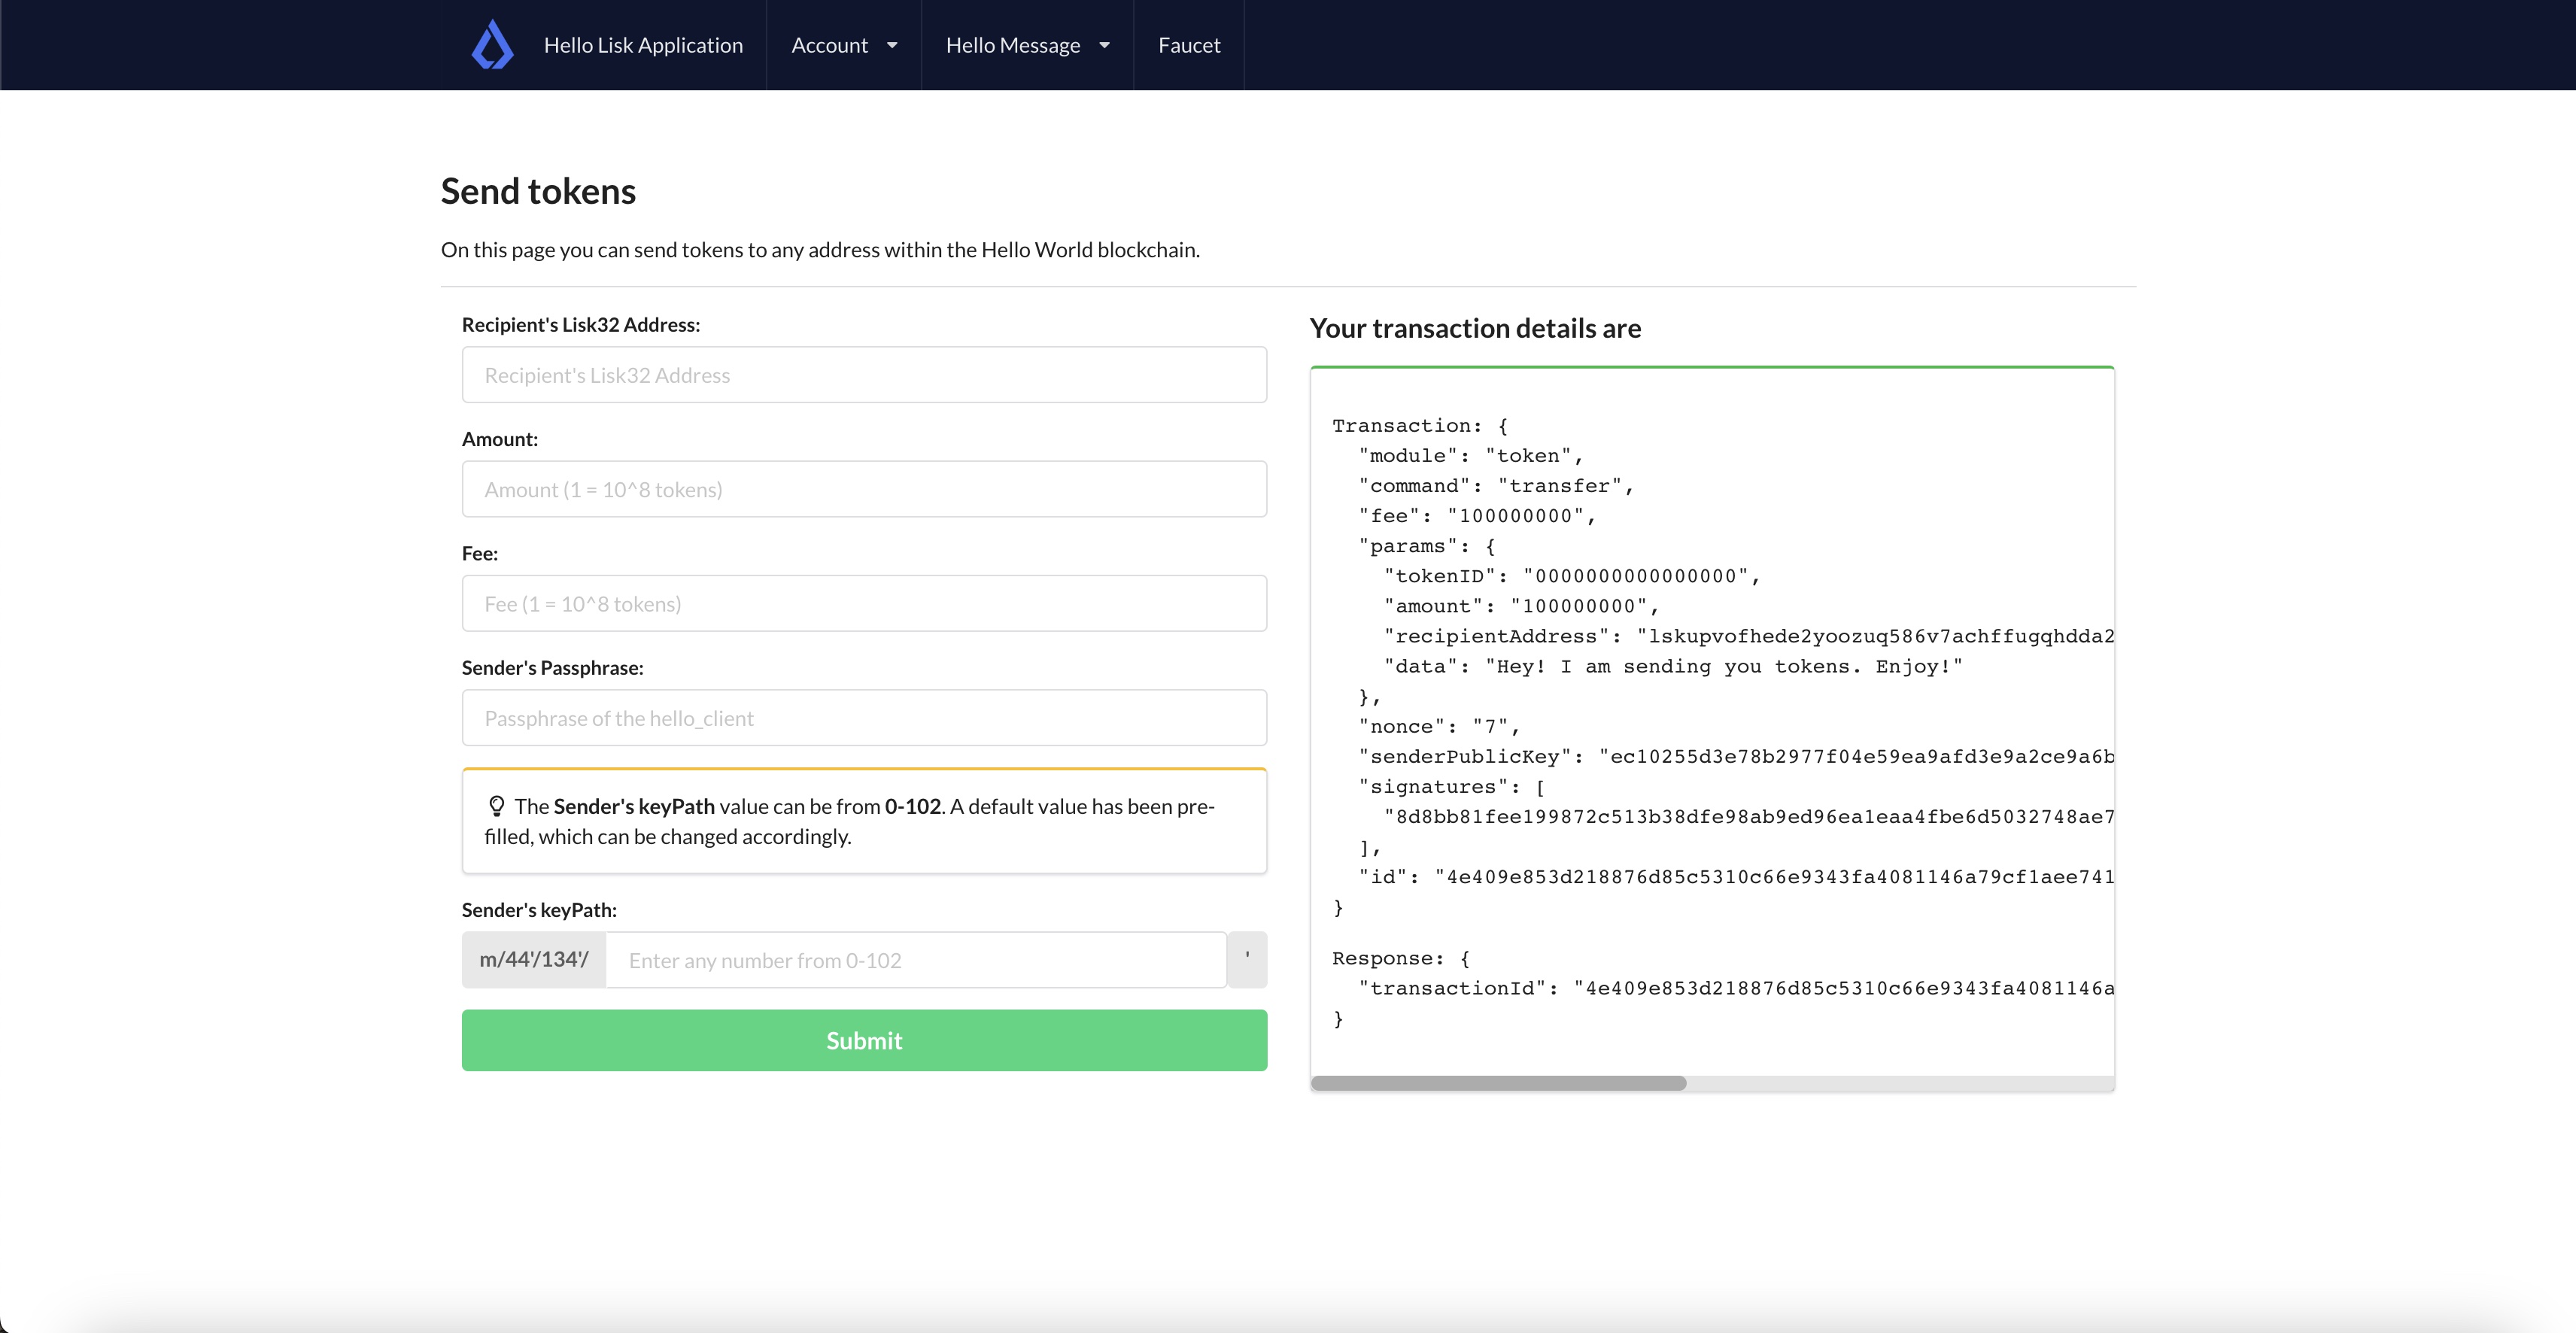
<h2>Send tokens</h2>
<p>On this page you can send tokens to any address within the Hello World blockchain.</p>
<Divider></Divider>
<div class="ui two column doubling stackable grid container">
<div class="column">
<Form onSubmit={handleSubmit} class="ui form">
<Form.Field class="field">
<label>Recipient's Lisk32 Address:</label>
<input placeholder="Recipient's Lisk32 Address" id="address" name="address" onChange={handleChange} value={state.address} />
</Form.Field>
<Form.Field class="field">
<label>Amount:</label>
<input placeholder='Amount (1 = 10^8 tokens)' id="amount" name="amount" onChange={handleChange} value={state.amount} />
</Form.Field>
<Form.Field class="field">
<label>Fee:</label>
<input placeholder='Fee (1 = 10^8 tokens)' id="fee" name="fee" onChange={handleChange} value={state.fee} />
</Form.Field>
<Form.Field class="field">
<label>Sender's Passphrase:</label>
<input placeholder='Passphrase of the hello_client' id="passphrase" name="passphrase" onChange={handleChange} value={state.passphrase} type="password" />
</Form.Field>
<Form.Field class="field">
<div class="ui yellow segment">
<i class="lightbulb outline icon"></i>The <strong>Sender's keyPath</strong> value can be from <strong>0-102</strong>. A default value has been pre-filled, which can be changed accordingly.
</div>
<label>Sender's keyPath:</label>
<div class="ui labeled input">
<div class="ui label">
m/44'/134'/
</div>
<input placeholder='Enter any number from 0-102' id="keyPath" name="keyPath" onChange={handleChange} value={state.keyPath} type="text" />
<div class="ui label">
'
</div>
</div>
</Form.Field>
<Button type='submit' fluid size='large' style={{ backgroundColor: '#2BD67B', color: 'white' }}>Submit</Button>
</Form>
</div>
<div className='column'>
<>
{displayData()}
</>
</div>
</div>
</Container>
</div >
</>
);
// [...]
}
// [...]Everything is in place now, let’s test the Account→Transfer Tokens page.
Create a new account and put it as the recipient of funds on the transfer page. Use the previously seeded account as the sender by entering its passphrase.
Based on the passphrase, the account will be identified and will be used in the token transfer transaction.
To check if the account balance has increased, use the account details page to fetch the account balance.