Part 1: Installation & setup
This document will explain how to prepare your computer for the workshop.
Requirements
Hardware
-
Computer.
-
Raspberry Pi Zero W, (running a headless Raspbian Buster lite).
-
Class 10 SDCard.
-
A generic analog light sensor based on an LDR.
-
Jumper cables.
-
USB <→ Micro-USB cable.
Software pre-requisites
Basic requirements for all machines, (Setup guide for the Lisk SDK):
-
A code editor such as Visual Studio Code.
-
Git.
-
Python 2.
-
Node.js
v12(usenvmfor easy switching between versions in case a different version is installed). -
Postgres 10.
1.0 Setup
Set up the applicable software and hardware and the installation of the dependencies.
Clone the repo and install the dependencies
The following steps below describe how to create the initial files for this tutorial:
-
Clone the Lisk SDK examples repository locally by executing the following commands:
git clone https://github.com/LiskHQ/lisk-sdk-examples.git
git ckeckout v4
cd lisk-sdk-examples
cd transport
The basic file structure is listed below:
Contents oflisk-sdk-examples/transport. ├── README.adoc ├── Workshop.adoc ├── client (1) │ ├── accounts.json │ ├── app.js │ ├── package.json │ └── views/ ├── iot (2) │ ├── README.md │ ├── light_alarm │ │ ├── package.json │ │ └── index.js ├── node (3) │ ├── index.js │ └── package.json └── transactions (4) ├── finish-transport.js ├── light-alarm.js ├── register-packet.js └── start-transport.js1 Contains the code for the client application. 2 Contains the code for the IoT application. 3 Contains the code for the node application. 4 Contains the custom transactions that are used by the node and client app. -
Navigate inside the
transport/transactionsandtransport/nodefolders, and then runnpm installto install the required dependencies for the node application as shown below:cd transactions npm install cd ../node npm install -
Setup the database as listed below:
-
If a previous database was created then it will be necessary to delete it and re-create a new one using the following command:
dropdb lisk_dev && createdb lisk_dev --owner lisk.
-
-
To verify if the setup is correct, try to run the application with the following command:
node index.js
This command will run the index.js file and starts the node application.
Please be aware that when starting the node for the first time this may require a few minutes.
If everything is running correctly, the node can be stopped by pressing CTRL+C.
|
In case the node crashes or does not function correctly, follow this guide to set up a dedicated development environment using Docker and Docker-Compose. The script will set up the whole environment. If the instructions in this guide are followed correctly, the remainder of this document can be skipped. |
Prepare the IoT device
Reference: Raspberry Pi set up.
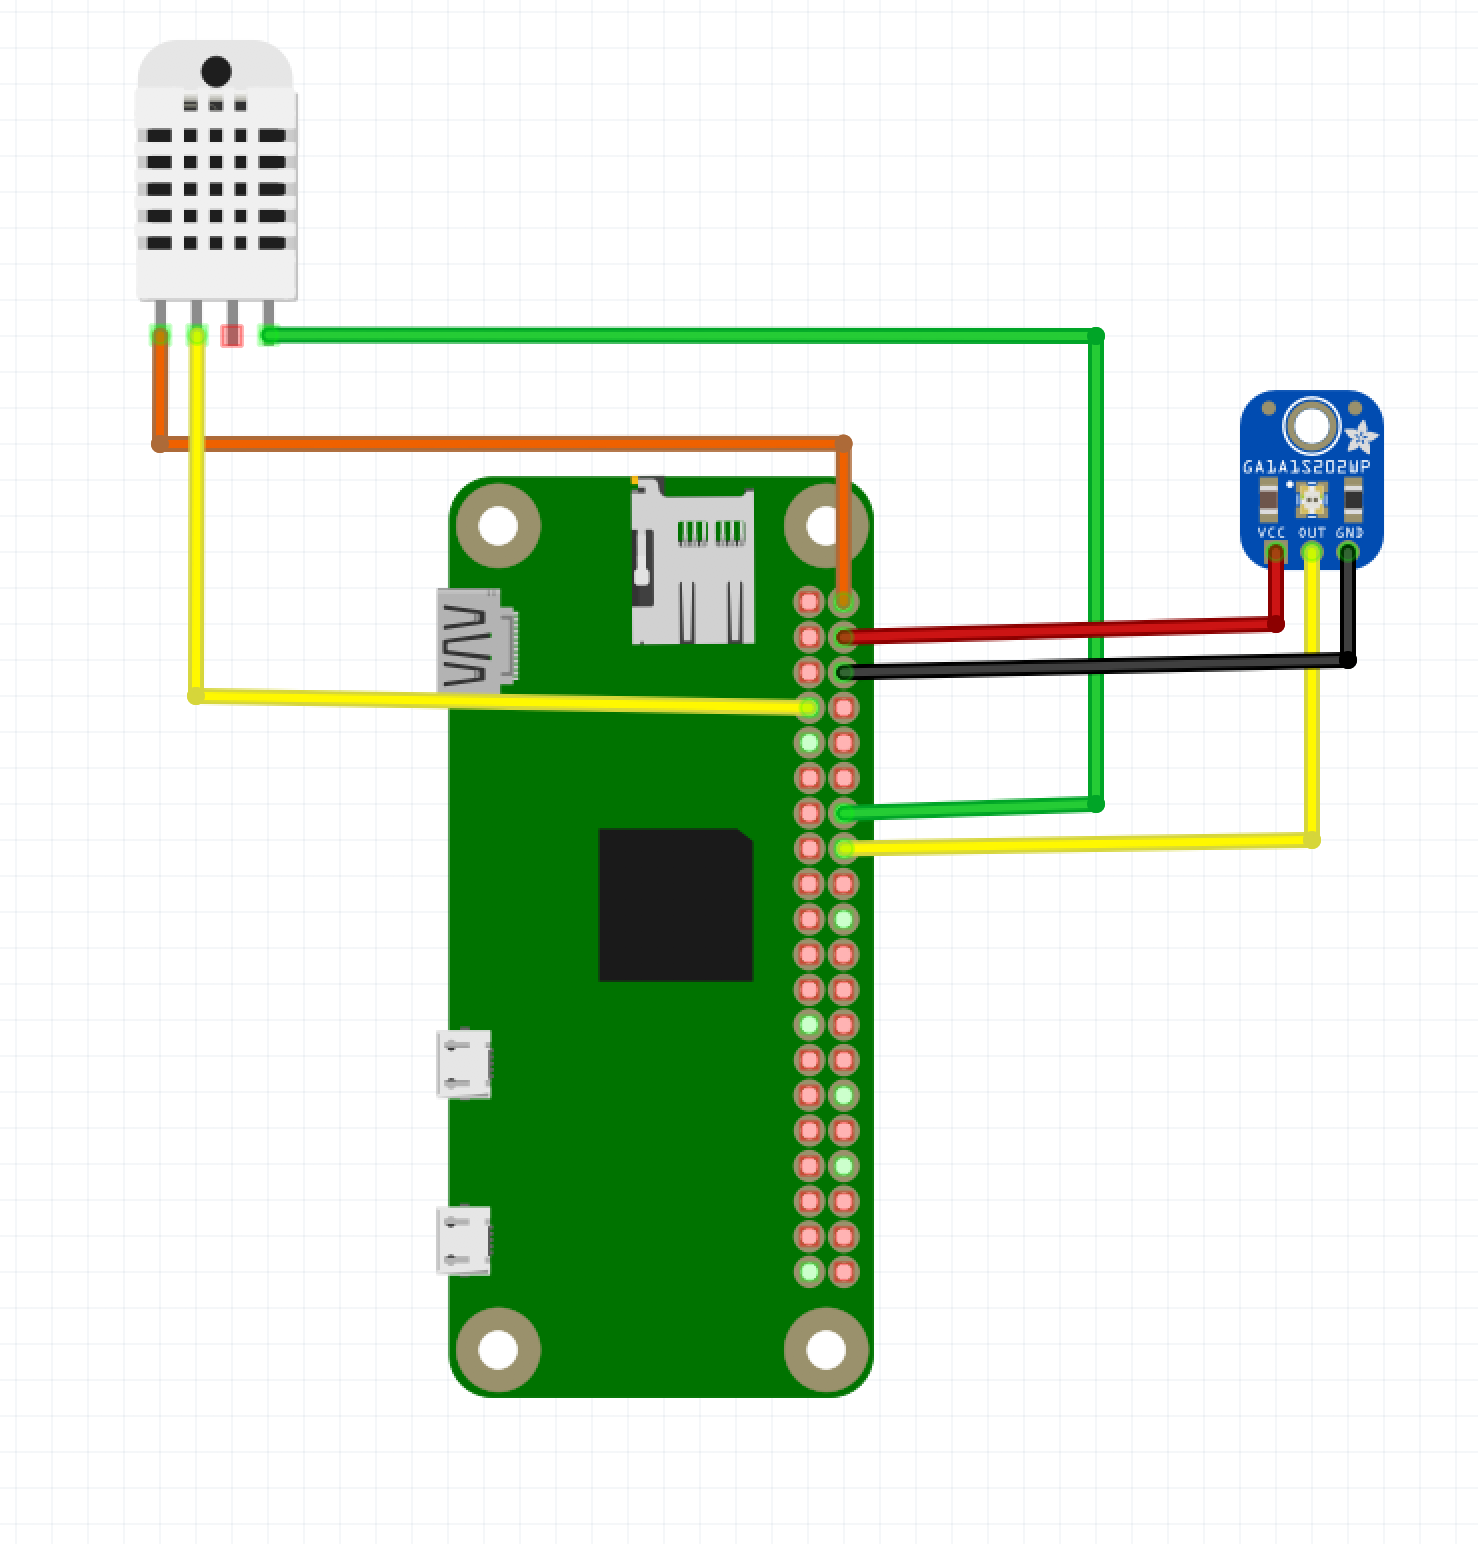
- Sensor wiring
-

- Preparing the Operating System
-
The operating system for the Raspberry needs to be copied from a computer into an SD card, for this we recommend using etcher (good tutorial at medium).
For preparing the Raspberry for
sshand wifi access follow this guide: Pi tutorial.As it is required to run the Raspberry in headless mode (i.e. no keyboard, mouse and monitor), it is necessary to also enable
sshthrough USB. To do so follow this guide ssh over usb. Once all those steps have been completed, the SD card can be unmounted and inserted into the Raspberry SD card reader. - Already installed libraries for accessing sensor data
-
The pins in the Raspberry need some libraries before they can be used for communicating with different sensors. For installing the required libraries, perform the following:
-
sudo apt-get install wiringpi -
sudo apt-get install pigpio -
Node.js can be installed with
nvm
-
- Connecting / Logging in to the Pi
-
For logging in to the Pi, plug it in using the usb port labeled usb. Next, wait for approximately one minute for it to boot (the green light in the Pi will stop flashing when the booting is completed), and then open a terminal and perform the following:
-
Type in the password — by default this is
raspberry