Protecting a forging node
Overview
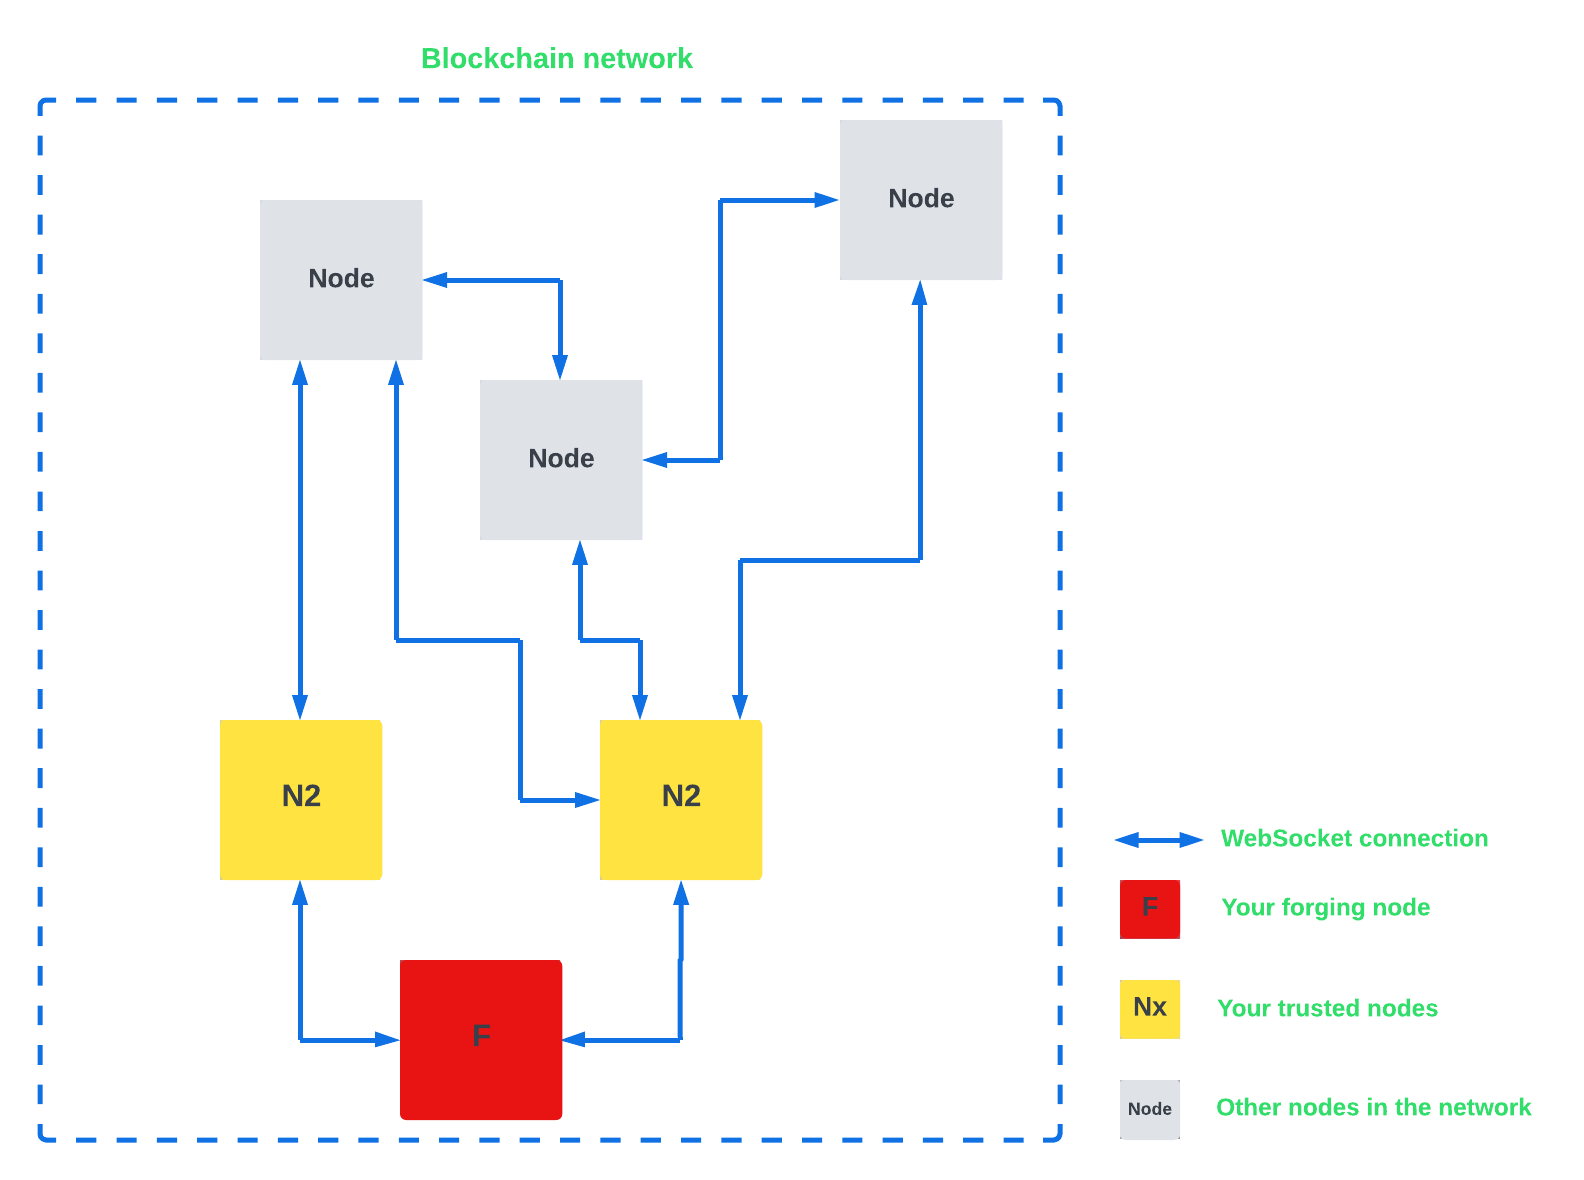
We will be setting up a forging node F as well as 2 trusted nodes Nx.
F will only ever be connected to Nx, and not accepting connections from any IP address.
We will then enforce this unidirectional communication with trusted nodes only by setting up firewalling rules on the forging node.
| There is no requirement to have a specific number of trusted nodes however, it is recommended to have no less than 2 for resiliency. |
Setup
|
The trusted nodes should be spread across service providers and geographically to prevent concurrent outages. If all trusted nodes become unreachable at the same time then the forging node cannot operate. |
All 3 nodes are installed on Ubuntu 20.04 LTS (Long Term Support), according to:
-
Lisk SDK setup
We will assume our forging node has the following example IPv4 (Internet Protocol Version 4), address: 192.0.0.1.
We will additionally assume that our trusted nodes have the following IPv4 addresses:
-
198.51.100.1 -
203.0.113.1
All nodes are assumed to listen to port 4000.
{
  network: {
    whitelistedPeers: [{
      // this is our forging node
      ip: "192.0.0.1",
      port: 4000
    }],
}{
// ... (other config options)
network: {
// Limit the maximum number of outbound connections to 2, the number of the trusted nodes
maxOutboundConnections: 2,
// Disallow inbound connections
maxInboundConnections: 0,
// Do not advertise our IPv4
advertiseAddress: false,
// Do not connect to any seed peer (the trusted nodes will be used, see below)
seedPeers: [],
// Those are our trusted nodes
fixedPeers: [
{
ip: "198.51.100.1",
port: 4000
},
{
ip: "203.0.113.1",
port: 4000
}
]
},
// ... (other config options)
}Firewalling
It is recommended to only allow incoming SSH (tcp/22) connections on the forging node.
UFW (Uncomplicated Firewall), is included by default on Ubuntu and can be used to that purpose.
An alternative example using firehol can also be found below.
UFW example
To activate the UFW firewall with the desired configurations, run the following commands:
sudo ufw default deny incoming
sudo ufw default allow outgoing
sudo ufw allow ssh
sudo ufw enable
sudo ufw status verbose
The last commands output should be similar to the following shown below:
Status: active
Logging: on (low)
Default: deny (incoming), allow (outgoing), disabled (routed)
New profiles: skip

To                         Action      From
--                         ------      ----
22/tcp                     ALLOW IN    Anywhere
Refer to https://ubuntu.com/server/docs/security-firewall for more information.
firehol example
sudo apt-get --assume-yes install firehol (1)
sudo vim /etc/firehol/firehol.conf (2)| 1 | Installs firehol. |
| 2 | Opens the firehol config file. |
Paste the following contents into the firehol config file:
/etc/firehol/firehol.confinterface eth0 wan
policy drop
server icmp accept
server ssh accept
client all acceptPress Esc + : w q + Enter to save the file and quit.
Now run the following commands:
sudo firehol try (1)
sudo sed -i 's/^START_FIREHOL=.*$/START_FIREHOL=yes/' /etc/default/firehol (2)| 1 | Checks the configuration and then activates the firewall. This commands will ask for confirmation as a fail-safe, and will reverse all changes if none is given after 30 seconds. |
| 2 | Sets START_FIREHOL=yes in /etc/default/firehol which will start the firewall automatically at the boot time. |
Refer to https://firehol.org/ for more information.